# Maintenance and Care
This section covers best practices for maintaining the sensor’s performance and reliability. Topics include weatherproofing, cleaning, and firmware updates — ensuring your equipment remains dependable in harsh field environments.
# Weatherproofing
The Camtraptions PIR Sensor v4 is built for reliable operation in demanding outdoor conditions. However, regular checks and care are essential to maintain its weather resistance and ensure dependable long-term performance.
#### **1. Check and Clean Seals**
The main seal around the **battery door** is critical to maintaining a watertight enclosure.
- Ensure the seal and its contact surface are **clean and free from vegetation, debris or grit** before closing the door.
- Inspect the seal periodically for **wear, cracking, or deformation**.
- If a seal is damaged, it should be replaced. **Replacement seals** can be obtained by contacting **Camtraptions Support**.
#### **2. Protect Unused Openings**
All external ports and access points should be securely sealed when not in use.
- Ensure the **weatherproof rubber caps** covering the **power and camera signal sockets** are firmly fitted to prevent moisture or dirt ingress.
- Check that the **SD card bung** (located beneath the right-hand flap) is fully inserted after use to protect the memory card slot.
- Replacement caps and bungs are available from **Camtraptions** if any are lost or damaged.
#### **3. Use Silica Gel**
In all environments, but particularly in **wet or humid conditions**, it is recommended to place a **small sachet of silica gel** inside the **battery compartment**. There is space beside the battery for this purpose.
- The silica gel will **absorb residual moisture** introduced when the door is opened (for example, during battery changes) and helps prevent internal condensation.
- Any small silica sachet that fits can be used, though **Camtraptions 1 g individually sealed sachets** are ideal for this application.
- Replace the sachet every **4-8 weeks in humid climates** or every 3-6 months in temperate conditions. Replace the sachet more often if the battery door is being frequently opened.
This simple precaution can significantly enhance the **longevity and reliability** of the sensor in challenging climates.
#### **4. Avoid Submersion or Flood Risk**
The sensor is **weather-resistant but not waterproof**. It is not designed to be submerged and should not be deployed in locations where it could be flooded — for example, in areas prone to **rising water, heavy runoff, or riverbank overflow**. Always mount the sensor in a position where it remains above likely water levels.
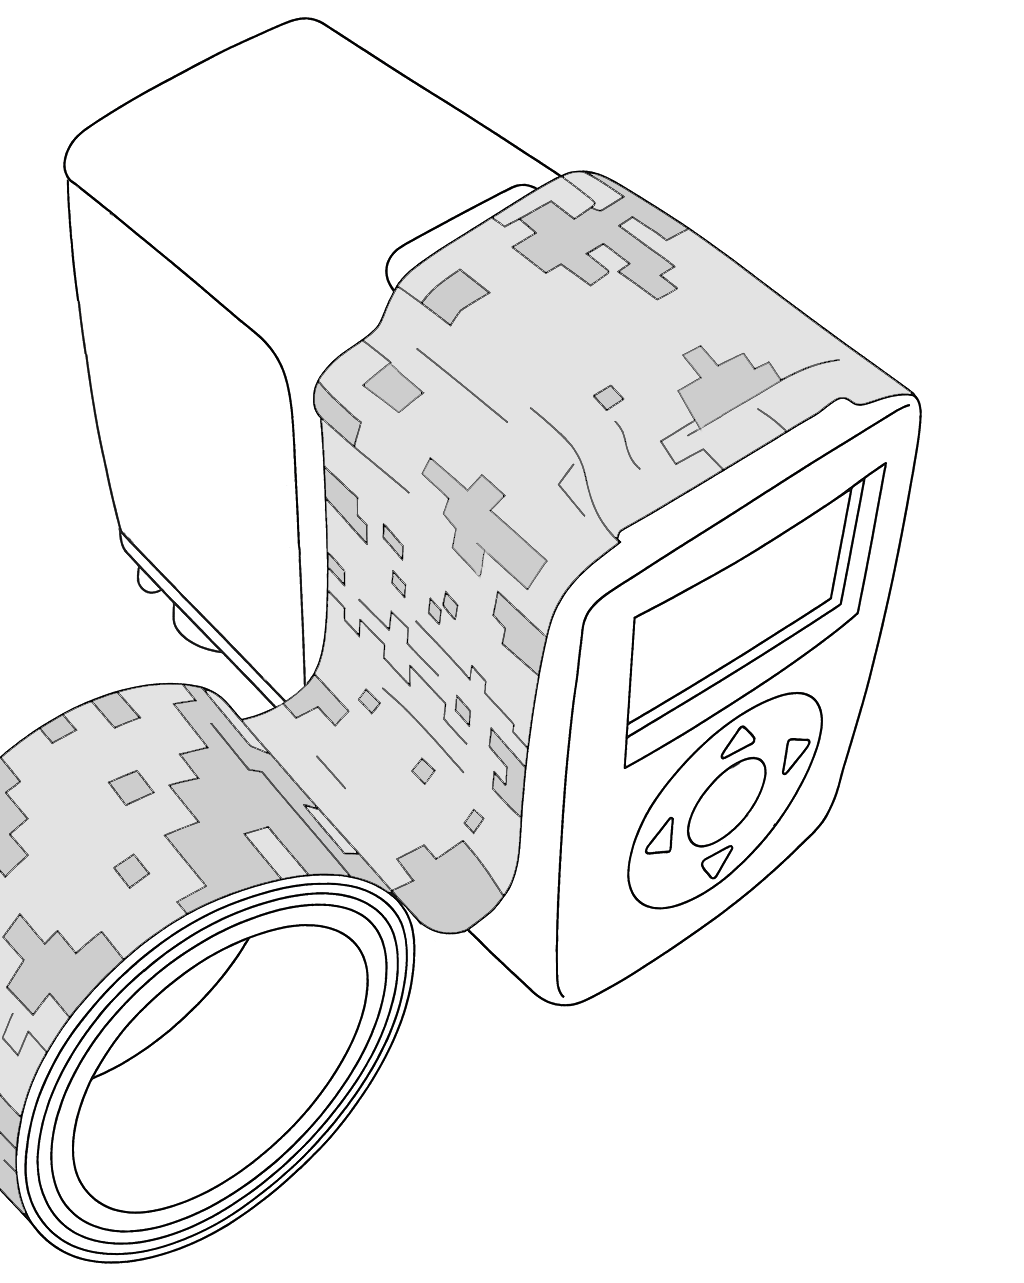
#### **5. Freeze-thaw Precautions**
In cold, wet environments, water could accumulate in the seam between the battery door and the main enclosure body. If temperatures drop below freezing, this water can **turn to ice and expand**, placing pressure on the door latch and potentially compromising the seal.
To minimise this risk, you can apply a **wide strip of waterproof tape** around the door joint—running from one lower corner of the enclosure, across the top of the latch, and down to the opposite lower corner. This simple precaution helps prevent water from pooling in the seam, reducing the likelihood of freeze-related damage during cold, wet deployments.
# Firmware Update
The Camtraptions PIR Sensor v4 supports **firmware updates** via microSD card. This allows new features, improvements, and bug fixes to be installed easily by the user without returning the sensor for servicing.
This manual applies to firmware version {{@0tag:Firmware Version}}. Check the sensor's current firmware version by navigating to the **Home Screen** and holding down the **right arrow** button for 2 seconds. If necessary, you can update the firmware by following the instructions below.
#### **Downloading Firmware**
The latest firmware releases can be downloaded from the **Camtraptions website**:
**[camtraptions.com/resources/pir-v4/](https://www.camtraptions.com/resources/pir-v4/)**
Each firmware version will include a short description of changes.
#### **Preparing the microSD Card**
To perform a firmware update, you will need a **microSD memory card** *(not supplied)*.
- The card must be **formatted in FAT32** and **no more than 32 GB in total capacity.**
- Copy the two downloaded firmware files directly into the **root directory** of the card — do not place them inside a folder or rename it.

#### **Inserting the microSD card**
You may find it helpful to use a pair of thin-nose pliers to insert the SD card into the sensor. The card slot is located beneath the right-hand flap on the side of the sensor. Remove the bung and insert the SD card so that the edge of the card is flush with the edge of the board.


It is possible to accidentally drop the microSD card into the sensor. If this happens then just turn it over and shake it until the card falls out again.
#### **Installing the Firmware**
1. Ensure a **fully charged battery** is installed in the sensor.
2. Insert the prepared **microSD card** into the **card slot** beneath the right-hand flap.
3. **Hold the Down button** while switching the sensor **on** to begin the update process.
4. The screen will not display anything but the **red** indicator light on the front of the sensor will turn on and shine **constantly** to indicate that the update is underway.
5. Wait approximately **30 seconds** while the firmware updates.
6. When complete, the **front LED** will blink briefly to confirm the update has finished successfully. The sensor's LCD screen will automatically turn on.
7. You can now remove the microSD card carefully using thin-nose pliers and re-insert the rubber card slot bung, making sure it is fully seated.
Do **not** remove the battery or power during the update process, as this could interrupt installation and corrupt the firmware.
If the microSD card is not inserted correctly (or not inserted at all) and the update procedure is commenced using the sensor's keypad, then the red LED will **flash** rapidly to indicate an **error**. To resolve this, remove the battery from the sensor to turn it off, then make sure the microSD is **correctly inserted** before re-attempting the firmware update procedure.
#### **Verifying the Update**
To confirm the update was successful:
1. From the **Home Screen**, **hold the Right button** to display the new firmware version.
2. Check that the displayed version matches the firmware file you installed.
If the version number does not match or the sensor does not boot normally, repeat the update process using a freshly formatted microSD card.