# Mounting Your Sensor
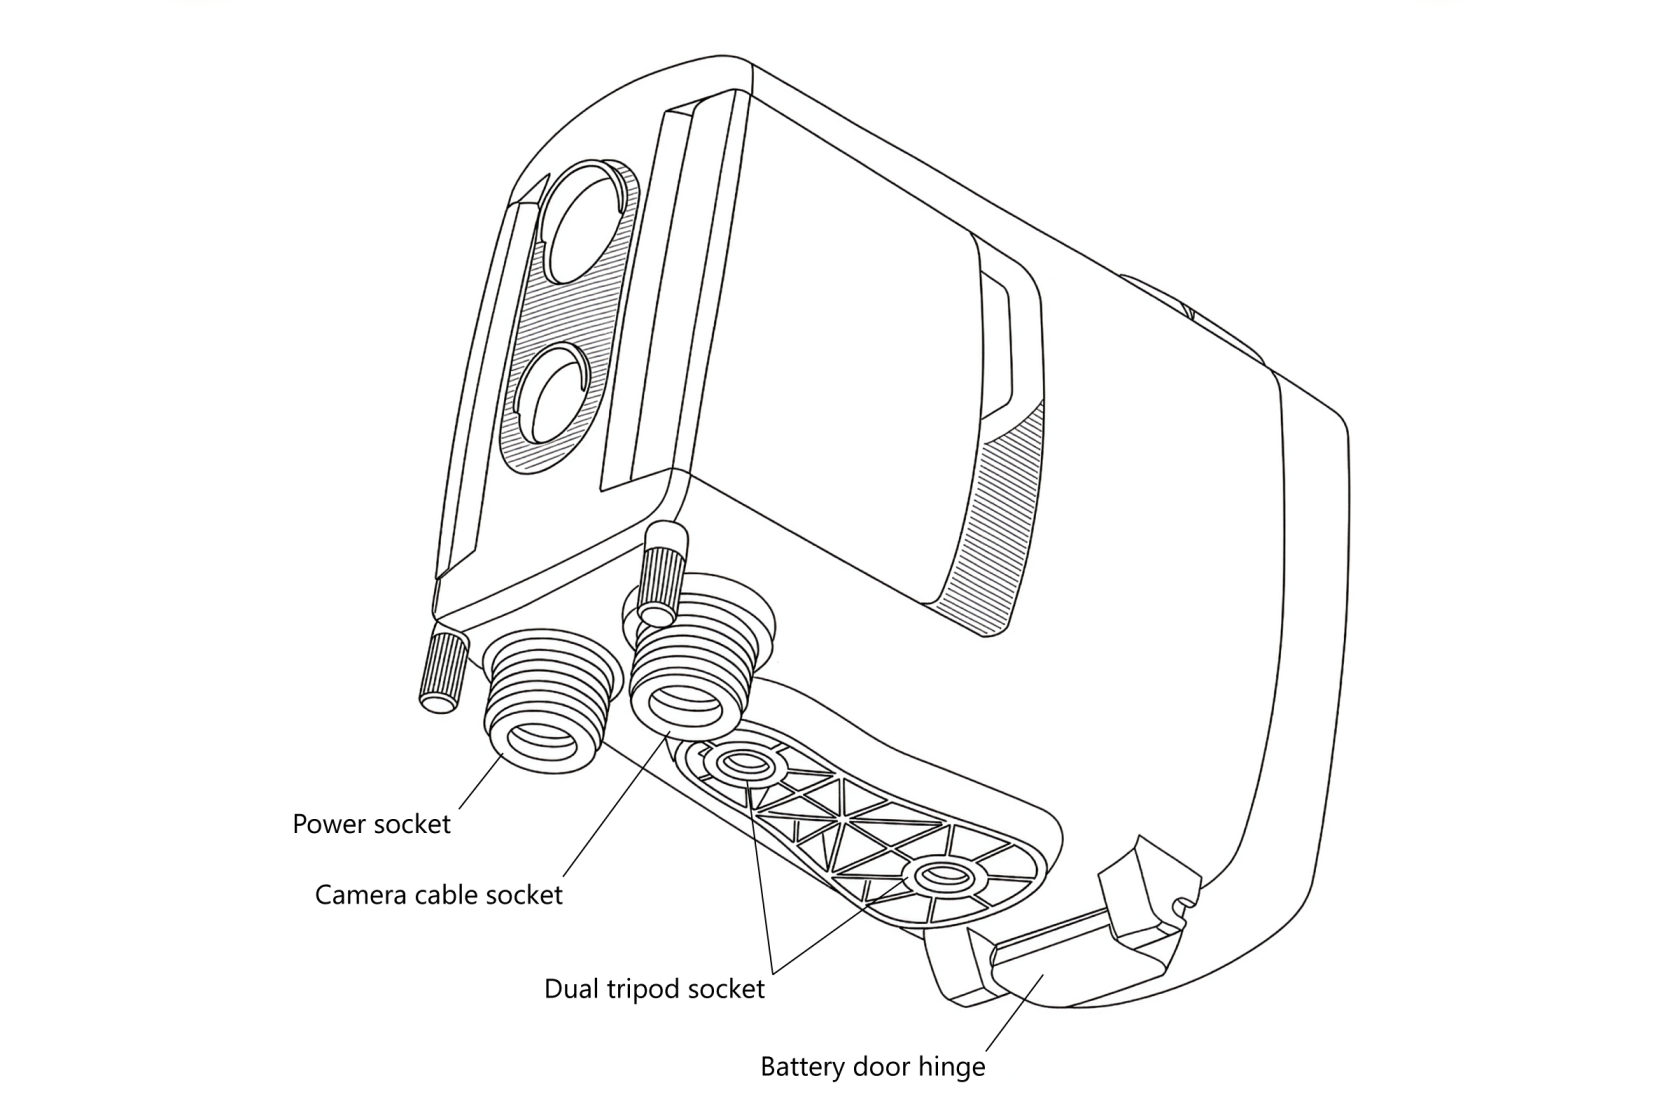
The Camtraptions PIR Sensor v4 features **two tripod sockets** on the underside, providing flexible and secure mounting options for a wide range of setups.
#### **Single-Screw Mounting**
For simple installations—such as when using a **MightyPod** or a **third-party tripod**—the sensor can be mounted using just **one tripod socket**.
#### **Dual-Screw Mounting**
For the most secure and stable mounting, particularly in outdoor or long-term deployments, a **dual-screw setup** can be used.
This prevents the sensor from twisting or shifting during installation or use. The **socket spacing** matches the standard used by the **Camtraptions Jungle Mount System**, enabling the sensor to be mounted on:
- The ground
- Posts or poles
- Tree limbs or trunks
This system provides a robust, flexible solution for positioning the sensor in almost any environment.
When selecting a mounting method, ensure that the chosen mount **does not obstruct the rear door** of the sensor when it is opened. If the mount prevents the door from opening fully, forcing it may damage the hinge. Always allow sufficient clearance for the door to open freely for battery changes.