# Set Clock Time
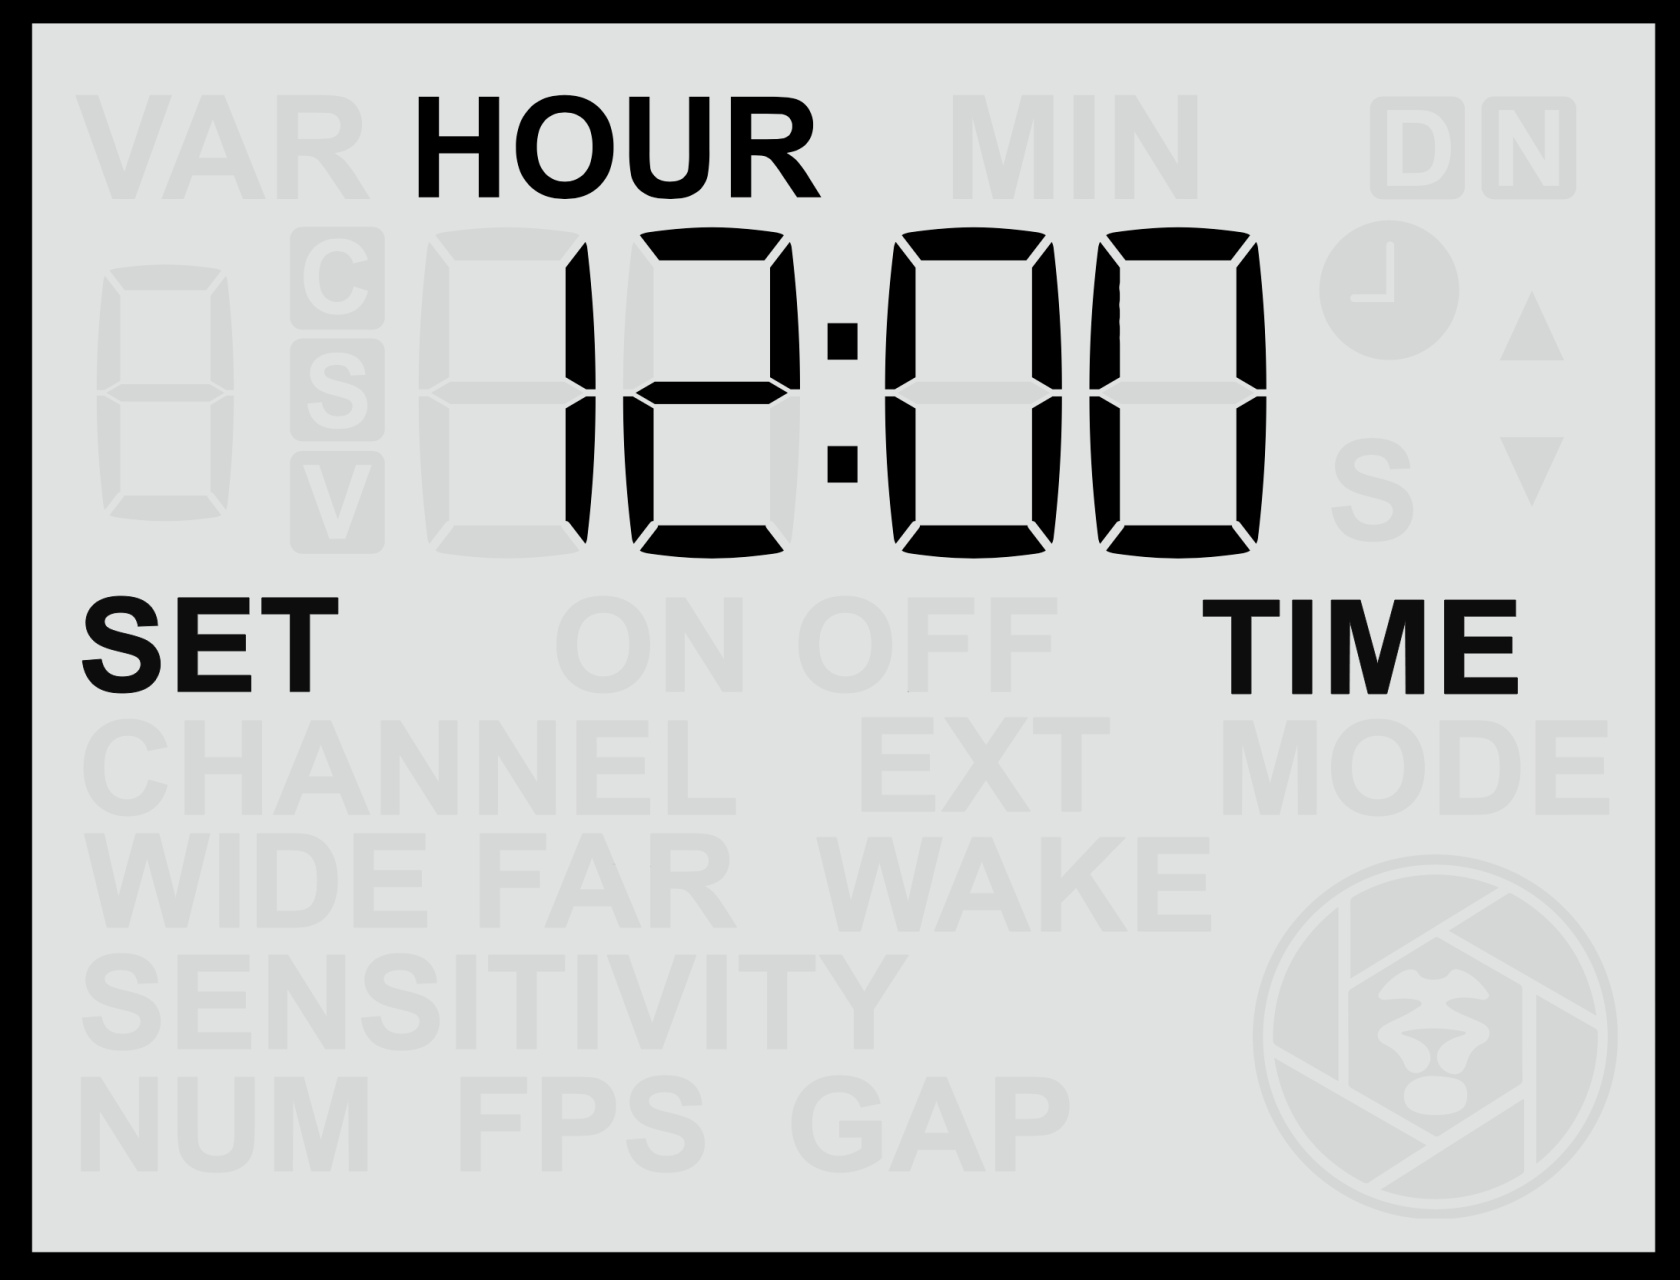
The **Set Clock Time** screen allows you to configure the sensor’s **internal clock**, which is required for **Time Windows** (scheduled active hours). Setting the correct time ensures the sensor operates accurately within any defined time periods.
|  |  |
#### **Setting the Clock**
1. From the **Home Screen**, press the **Right Arrow** until you reach the **Set Clock Time** screen.
2. Press the **Up** or **Down** buttons to adjust the **hour** value.
3. Press the **Set** button to confirm the hour.
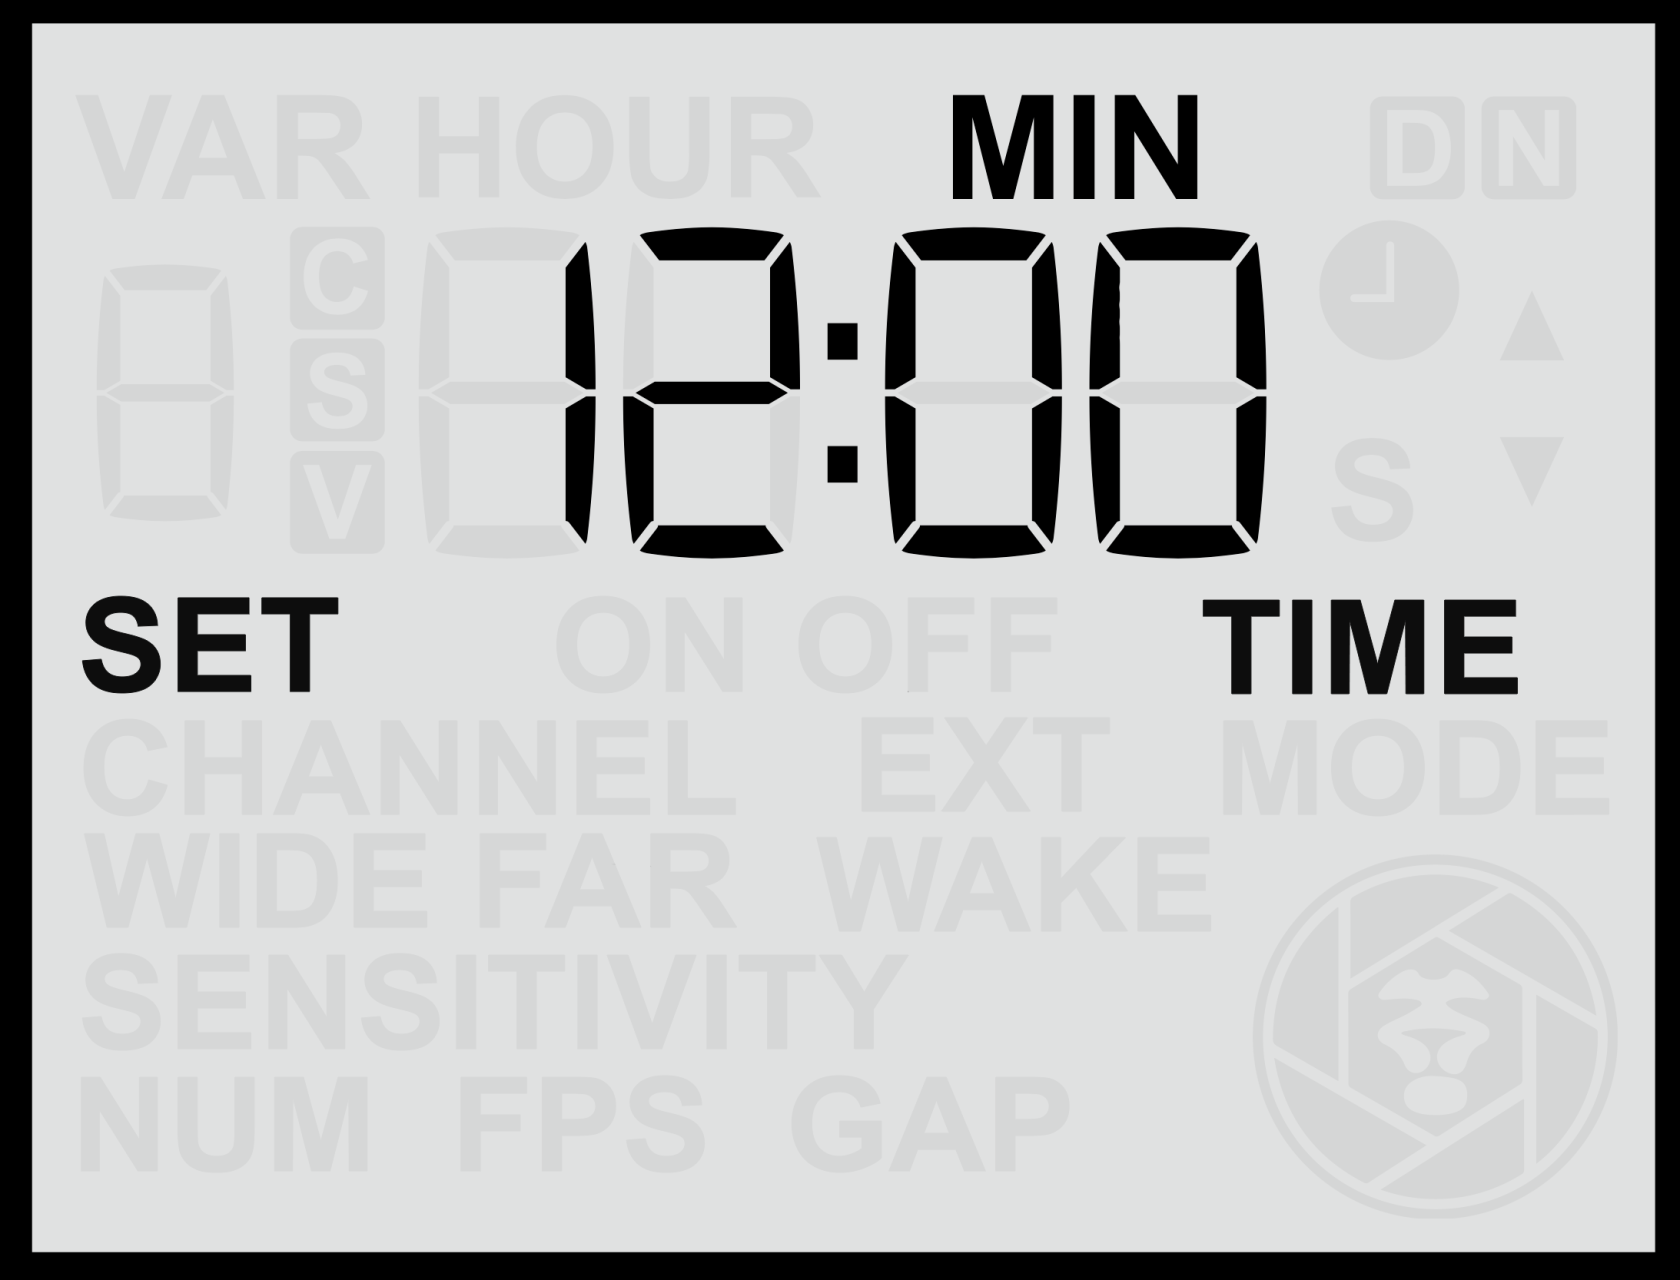
4. The **minute** value will then begin flashing — use the **Up** or **Down** buttons to adjust it.
5. Press **Set** again to save the time.
The clock uses a **24-hour format** (00:00 to 23:59).
Note: The clock setting is retained internally, even when the sensor is powered off or the battery is removed.
Note: For accurate operation of **Time Windows**, ensure the clock is set to **local time** in the location where the sensor is being deployed.