
Connecting Your Camera
The Camtraptions PIR Sensor v4 can trigger your camera in two ways: wirelessly or via a wired connection. Both methods are compatible with DSLR and mirrorless cameras that feature an external shutter-release socket.
1. Wireless Connection (Default)
The sensor includes a built-in wireless transmitter that communicates with Camtraptions Wireless Receivers. This is the simplest and most flexible way to set up your camera trap.
- The wireless transmitter is enabled by default and set to Channel 1.
- You can change the channel via the Wireless Channel screen in the sensor’s menu.
- Up to 15 channels are available, corresponding directly with the 15 channels available on Camtraptions Wireless Receivers.
To establish a connection:
- Ensure the wireless channel on the sensor matches the channel setting on your wireless receiver.
- Plug the wireless receiver into your camera’s shutter-release socket using the appropriate Camtraptions camera connecting cable.
The wireless transmitter can be disabled in the menu if you prefer to operate the sensor via a wired connection.
2. Wired Connection
Alternatively, the sensor can be connected directly to the camera using a wired cable.
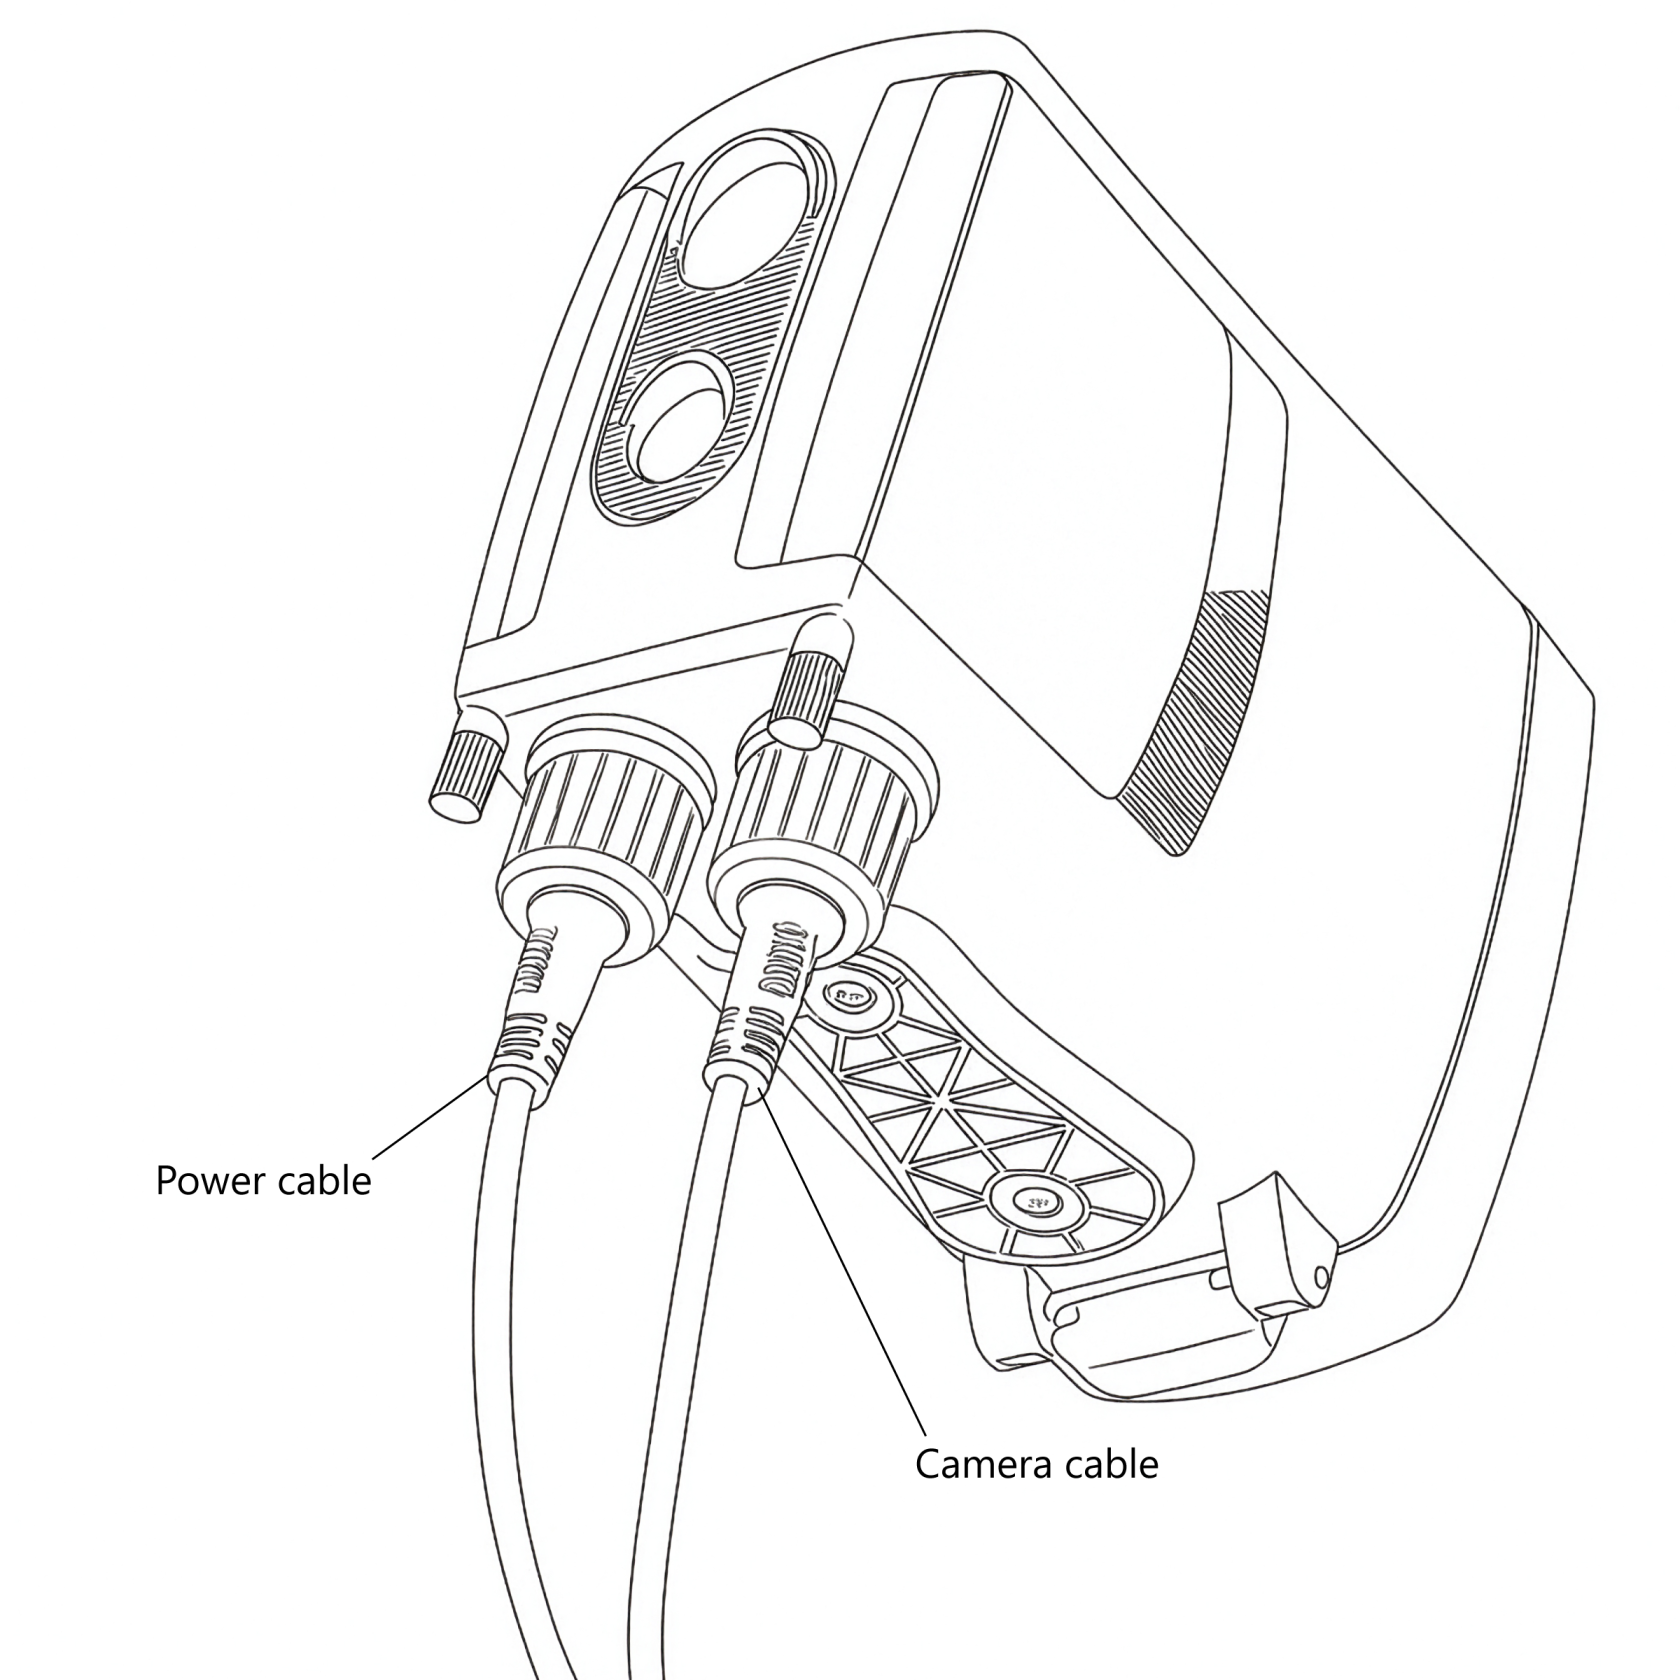
- The camera output socket is located on the underside of the sensor and protected by a weather-sealing rubber bung.
- Use the Camtraptions Screw-lock Waterproof Cable for PIR Sensor v4 to connect the sensor to your camera’s shutter-release socket. Ensure that the black silicone sealing bands on the waterproof cable's connector jacks are seated evenly on the connector barrel. Plug in the cable and screw on the locking nut to fasten. Do not over-tighten the cable's locking nuts - excessive force is not required to make a good seal. Additional Camtraptions Waterproof Cables and adapters will be necessary to complete the connection to the camera.
A standard Camtraptions camera connecting cable or sensor extension cable can also be plugged into the sensor, but using these basic cables instead of the dedicated waterproof cable system will void the warranty of the PIR Sensor v4, as its weather-sealing will not be maintained.
This creates a robust and highly reliable direct connection between the sensor and the camera.
Waterproof Cable Connection Tips
- If access is restricted, removing the side flap and thumbscrew can make it easier to tighten or loosen the cable nut securely.
3. Choosing Between Wireless and Wired
Both connection types have advantages, depending on your setup requirements:
| Connection Type | Advantages | Considerations |
|---|---|---|
| Wireless | Fast and simple setup. No cables between camera and sensor, allowing greater flexibility in positioning. Reduces risk of cables being pulled, damaged, or chewed by animals. | Wireless receiver consumes additional power, impacting total standby time of the setup. |
| Wired | Very power-efficient. Does not require a powered receiver. Immune to wireless interference and blocked or weak wireless signals. | Requires a physical cable connection, limiting placement flexibility and adding potential for cable damage or disturbance. |
In most cases, the wireless setup is preferred for its simplicity and flexibility, particularly when the sensor needs to be positioned several metres away from the camera. However, a wired setup is ideal when power efficiency is the priority or when the sensor and camera are mounted close together.
Camtraptions Wireless Receivers are designed for exceptional energy efficiency, making long-term wireless setups (lasting weeks or even months) possible when paired with larger batteries or solar power systems.