
Connecting the Cable System (wired version only)
1. Prepare the Camera Housing
Open the Weatherproof Camera Housing and locate the four blanking plugs in the cable-entry holes on its underside.
Remove three of the four blanking plugs. Retain the remaining blanking plug in the unused hole, and keep the removed plugs in a safe place for future use.
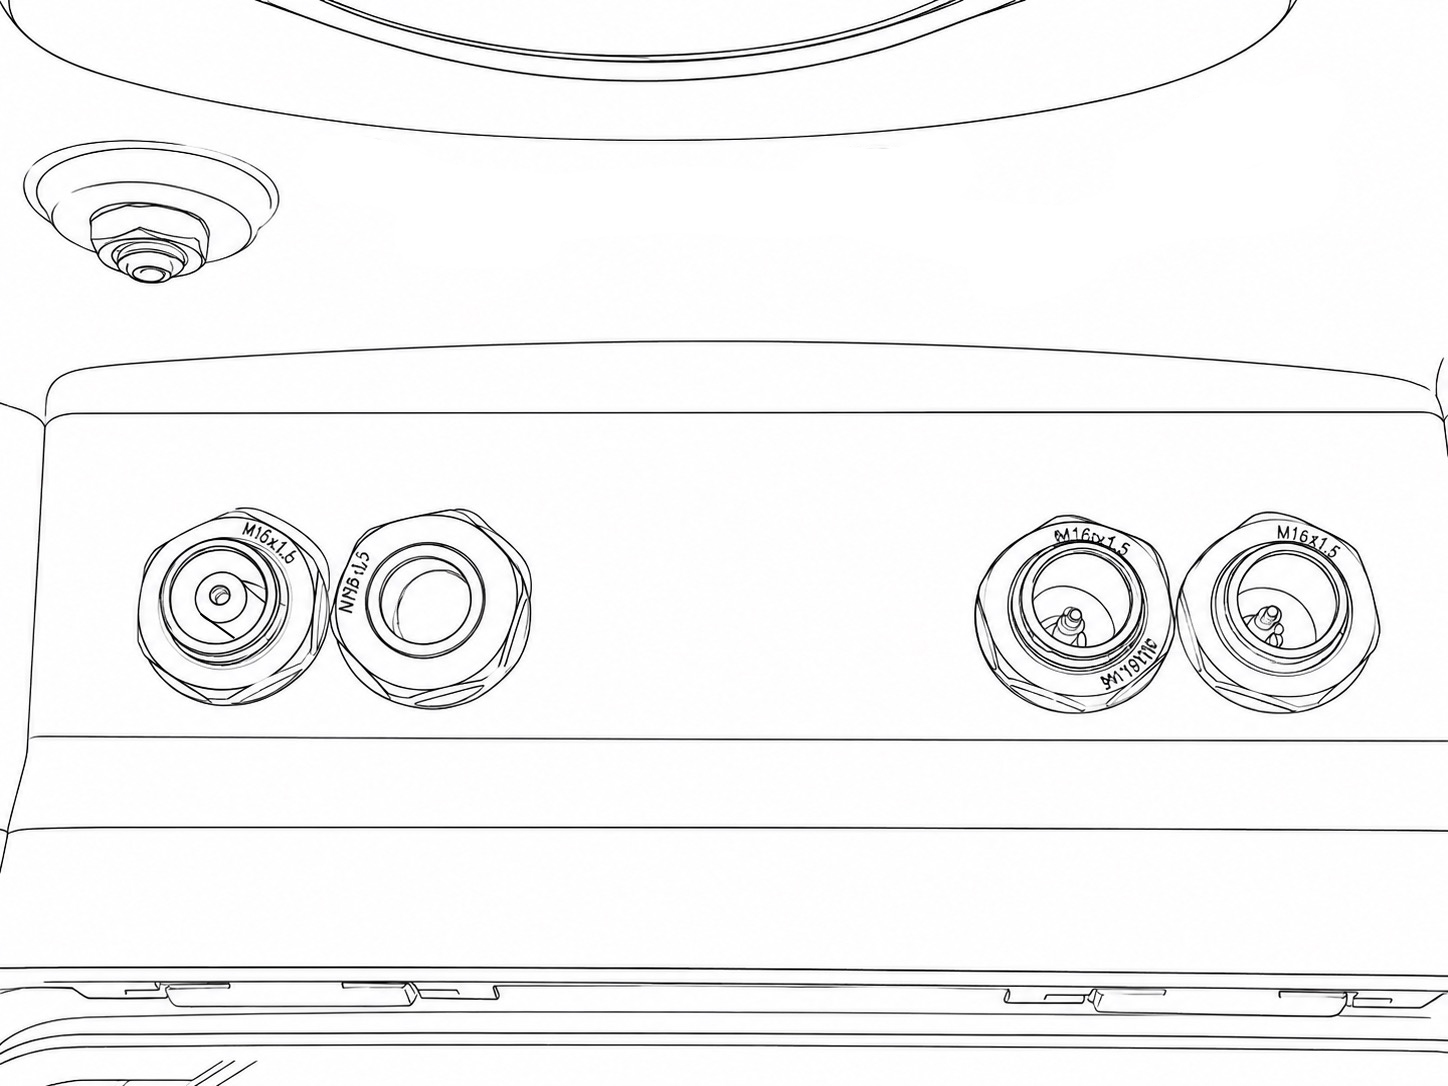
Fit the following connectors into the open holes on the bottom of the Camera Housing:
- The waterproof female 2.5mm connector on the Waterproof PIR Signal Cable.
- The male ends of the two Waterproof Flash Signal Cables.
The nuts of the waterproof connectors must first be removed from the connector threads. Do not remove the rubber washer from the waterproof connector thread. The connectors should be pushed up into the open holes in the floor of the Camera Housing from the outside. The nuts should be re-secured back onto the threads from the inside. Tighten the nuts to apply sufficient pressure and to create a good seal with the rubber washer on the outside of the Camera Housing.
The floor of the Camera Housing should look like this:
2. Make the connections inside the Camera Housing
Fit the Flash Hot Shoe Adapter into the flash hot shoe mount of the camera. Make sure that it is oriented correctly. Once in place, secure the Flash Hot Shoe Adapter by turning the collar and locking it fully down.
Connect your Camera Connecting Cable (sold separately) into the shutter release socket of your camera.
Next, connect the Wired Z Pro Flash Adapter. Each branch of the cable is labelled with what it should be plugged into. Connect the right-angle 3.5mm mono jack into side of the Flash Hot Shoe Adapter. Connect the 2.5mm Female Socket to the 2.5mm male end of your Camera Connecting Cable. Connect the 3.5mm Female end of the silver adapter to the 2 Way Flash Splitter. Connect each of the two female ends of the 2 Way Flash Splitter to the two male waterproof connectors of the Waterproof Flash Signal Cables in the floor of the Camera Housing. Finally, connect the remaining 2.5mm end of the Wired Z Pro Flash Adapter to the waterproof connector of the Waterproof PIR Signal Cable in the floor of the Camera Housing.
3. Complete the connections to the Z Pro Flashes
Remove the M16 blanking plugs from the backs of the Flash Housings and keep these safe for future use.
Remove the nuts from the female waterproof connectors of Waterproof Flash Signal Cables. Do not remove the rubber washers from the threads. Insert the threaded ends of the waterproof connectors through the holes in the rear panel of the Flash Housing. Re-apply the nut onto the connector's thread from the inside of the Flash Housing's rear panel. Tighten it with sufficient pressure to create a good seal between the rubber washer and the rear panel of the Flash Housing.
Plug the straight connector of the 20cm Flash Cable into the female waterproof connector now assembled as part of the Flash Housing's rear panel.
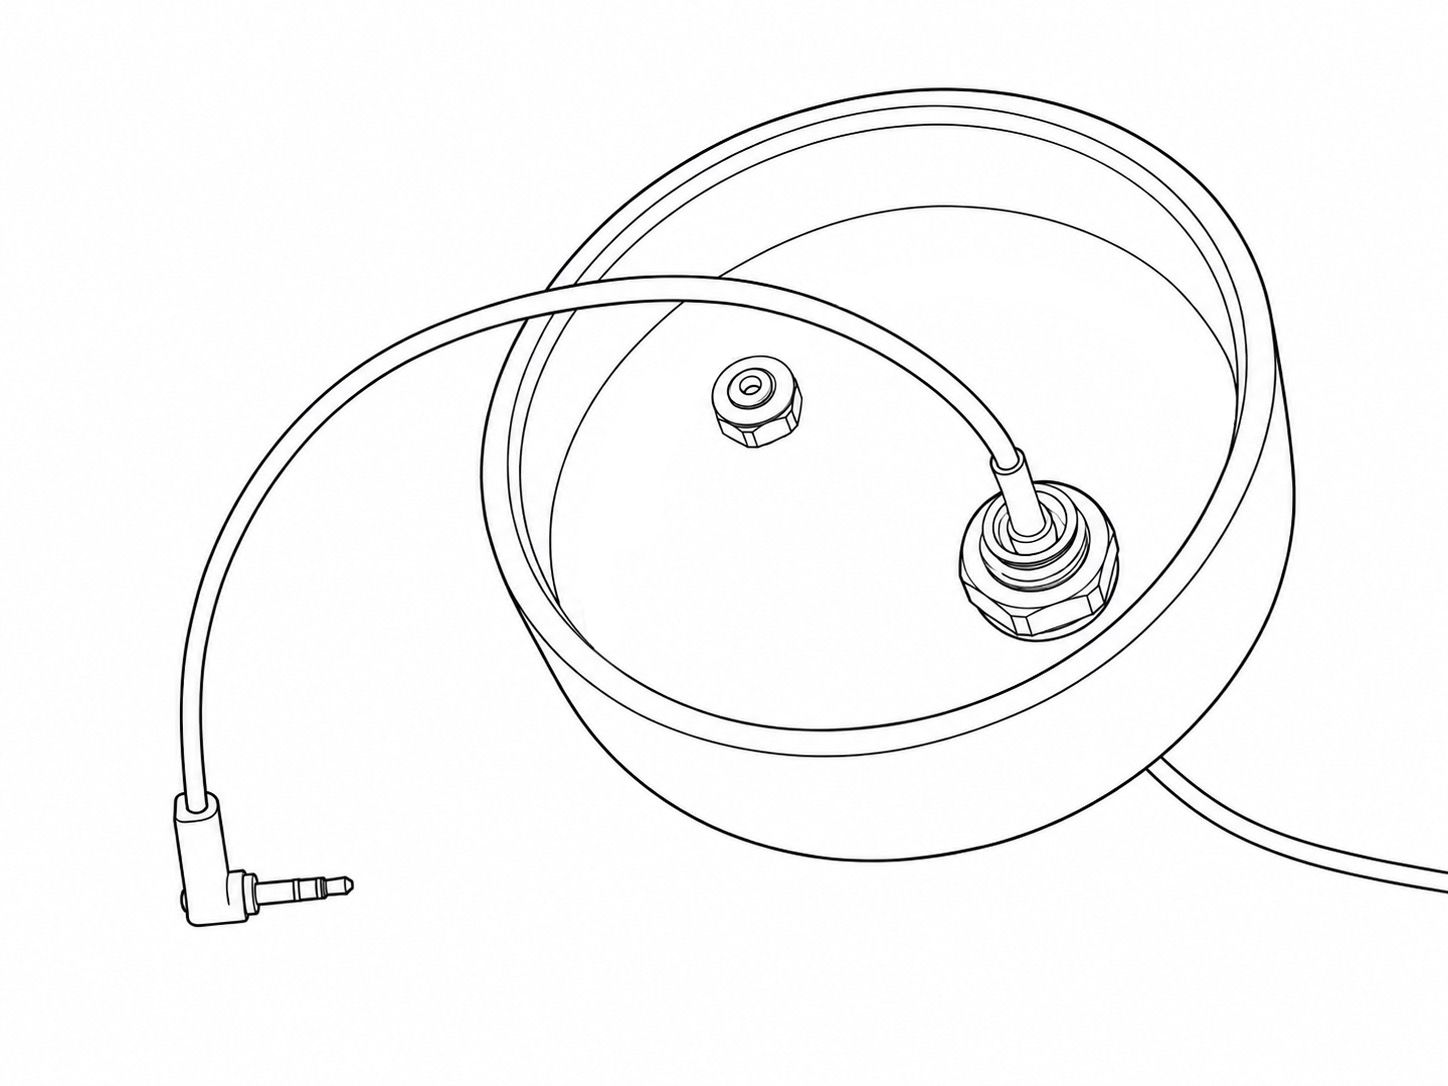
Plug the right-angle connector of the 20cm Flash Cable into the 3.5mm sync socket on the side of the Z Pro Flash.
4. Complete the connection to the PIR Motion Sensor v4
Remove the rubber plug from the PIR Sensor v4's signal socket and keep it safe for future use.
Plug in the 2.5mm male end of the Waterproof PIR Signal Cable into the signal socket of the PIR v4. Lock it in place by fastening the cable's lock nut onto the thread of the PIR v4 until the rear side of the lock nut pushes up into the rear side of the cable connector.